One thing that absolutely had to happen was a bar. I can remember in the weeks leading up to buying our home that I would spend hours online looking at other guys Caves and seeing how they set up their bars and trying to figure out how I would set mine up. The first thing I noticed was that these things weren't cheap!
I shopped online for used bars, bar plans, and even portable bars. All of them started at a couple hundred and went up from there. Not that some of those weren't affordable options, but when it comes down to how I'd like to spend my extra hard earned cash the answer is always baseball cards! lol... So I decided I was going to have to build my own to try and save as much loot as possible.
As luck would have it I had one (sorta) fall right in to my lap. It wasn't a bar per say, but what can I say... I've got vision and see things that other just can't.
As I've stated in the past I work for a certain rental car company... let's just say "I'll come and pick you up!" and my company was doing a city wide remodel of all rental car branches. As a branch manager I had a responsibility to help get my office cleaned out and set up to make the new furniture move as smooth as possible. We were getting new everything... counters, desks, computers... the whole nine.
That's when I noticed that my old rental counter would make one helluva bar in my Man Cave! Check it out...

Allow me to play Cap't Obvious... This is the counter from straight on

And from the side... and finally...

from the rear.
The plan for them was to discard this... I believe they were going to send the old furniture to a recycle center. So I jumped on the phone and asked our Operations guy if I could take it home. First he asked me why and I explained that I wanted to turn it in to a bar. Then he said yes, but on one condition. That I show him the final results when it was finished. Done and Done! Turns out I was the first person ever to ask to take any old furniture home and they didn't require any type of money for it at all.
Boom Baby! A FREE Bar!
So on Move Day I rented a Cargo Van and loaded it up. It was actually all taken apart while I was away from my office on other work business so I didn't get to see it deconstructed. That would become a challenge eventually but I assumed it'd be easy to take care of. So I unloaded it when I got home and began the process of organizing all the pieces in to groups. Here it is at home all taken apart.


So I was basically left with 4 panels, a table top, a counter top, and a box of hardware and not a shred of directions. Easy... right??
First thing I did was paint the 4 panels that made up the walls of the bar. They were made of this recycled wood type material and were a bear to move around. I painted them black and once they were dried I began to figure out how I was going to put them back together. I went to other offices at work that hadn't been made over yet and tried to figure out how they were put together. Honestly it helped a little but not really much at all... I was just going to have to wing it.
Lucky for me I married a genius and was able to convince the wife to give me a hand. She turned out to be the X factor I needed!
Here we are putting it back together piece by piece. After we figured it out it was pretty easy. Mostly snap together parts.


Once we reconstructed the four panels all we had to do was lay down the table top and screw it in place and then the counter top went on the other side. Here it is all put together in its new home!

Looks great! But not done yet! Next thing I wanted to do was to really set this off and what better way to do that then with a Baseball Card Collage Bar Top!?! Lord knows I have enough cards to do it. So I went online and did some more research and came across a few pictures of other examples of this sorta project and went to task.
I went ahead and grabbed a roll of butcher paper and some spray glue from the local craft store and planned my layout before I actually executed it. After all once you start that kinda project you can't turn back!

I decided that I liked the look of all the cards being turned in different directions but with clean parallel lines at the same time. A clean look, but more unique then just putting them all in the same direction.

Once I had a rough idea of how I wanted them to look I went to the Cave and got it started. I got some great shots of the progression of it all... Check it out!

Much like the Free Masons I needed a corner stone to start my project. I choose an excellent Brooks Robinson card and began to work my way from right to left.

The Bar Top wasn't the perfect width to be able to lay out all my cards with out having any gaps so it forced me to use some other cards that weren't standard sized and I think it makes it look that much better. You'll notice I used tobacco sized cards as well as the Goudey sized cards to fill in the blanks.

There were two ways I could have done this. I could have sprayed the glue directly on the bar top or on the back of each individual card. I choose the latter. If you decide to do this make sure you try to keep one hand clean the entire time to help lay the cards down. If not you'll find your self with a mess on your hands... literally. Here is the rest of the progression.


Once I got 3/4 of the way down I decided to start from the left and work my way back and bridge the gap so ensure the other end had a nice clean look.

Now it was just a matter of bridging the gap.

And now the finished product!

The last thing I needed was a couple of Swanky Bar Stools. I picked up these two from Value City and are the perfect match to complete this bar.
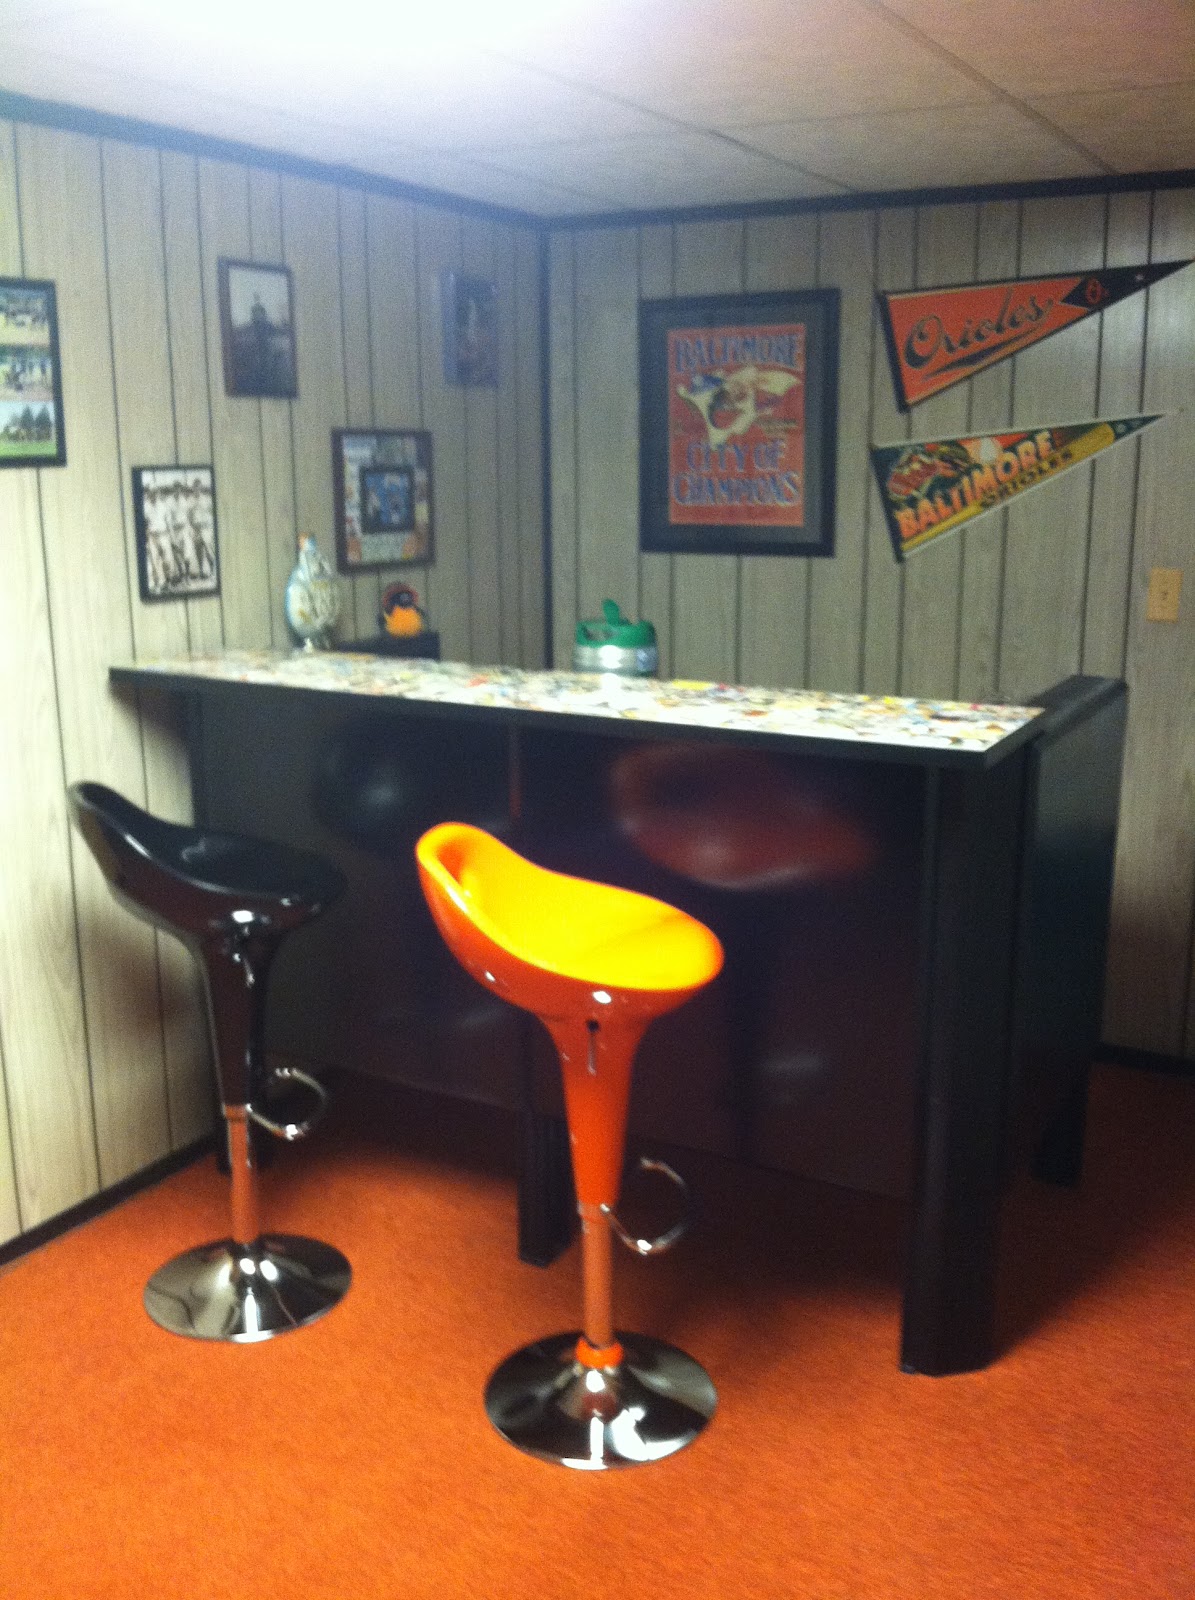
Talk about a transformation! I think it looks amazing. The only thing I have left to do is put a couple of clear coats over the bar top. I'm undecided if I want to do a clear resin top or pick up a custom piece of glass to put on top. Feel free to make suggestions. Hope it inspired some of you!
Stay tuned for the full unveil of the Cave!
Nicely Done!
ReplyDeleteI vote for the resin, although I don't know why.
Love the orange and black stools!
ReplyDeleteGo for the resin, Woog. Less danger of cracking/shattering, and easier cleanup without streaking, imho.
ReplyDeleteGreat project!
ReplyDeleteFantastic remodeling tips. For implementation, I used California's Countertop Craftsmen.
ReplyDelete